
Most beginners don't choose a grip. They just pick the paddle up and hold it however it lands in the hand. That works for about three sessions, until you meet someone who dinks, and suddenly your "natural" hold is popping every soft ball into the sky.
Your grip is the only connection between what you want to do and what the ball actually does. Get it right and dinks settle, blocks stay down, and your hands speed up at the net. Get it wrong and you'll fight your own paddle for months.
Good news: there are really only four grips worth knowing, and as a beginner you only need one of them. Here's the whole picture, then exactly what to do with it.
The one reference point you actually need
Forget the numbers for a second. Every grip comes down to a single landmark: the big knuckle at the base of your index finger, the one where the finger meets the back of your hand. Coaches call it your "X." Find it on your own hand right now. Your second landmark is the heel of your hand, the firm pad at the base of your palm.
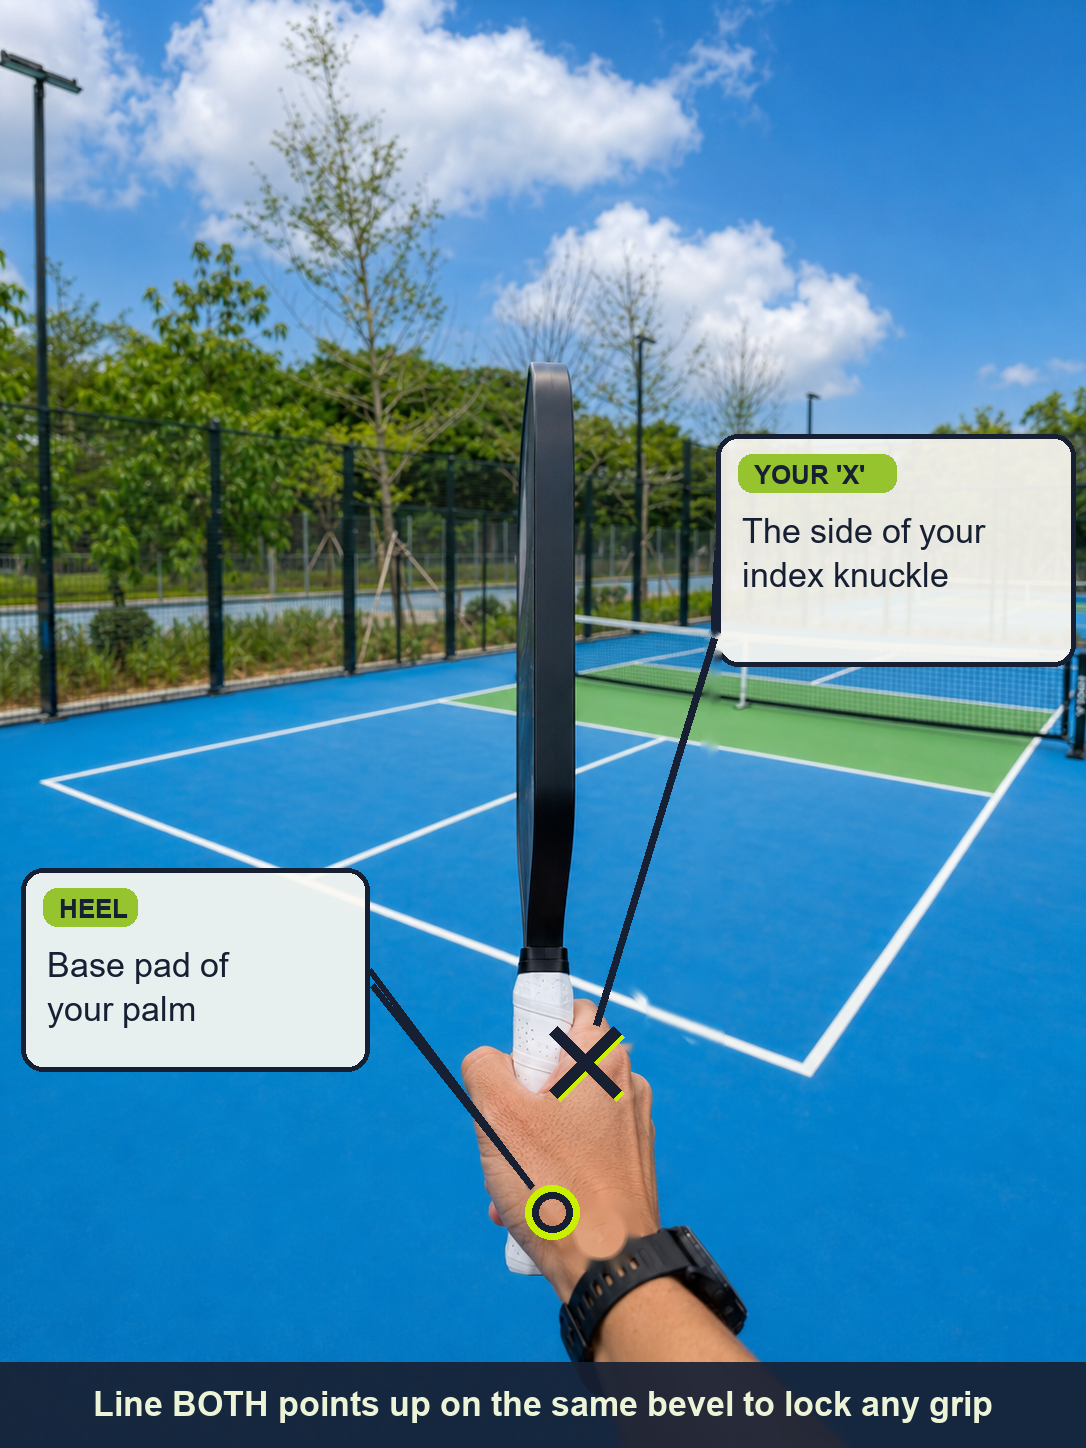
That's the whole system: where your X knuckle sits on the handle is your grip. Turn the handle a little so the knuckle lands on a different face and you've switched grips. Each grip below is really just "hold the paddle until it feels a certain way", the knuckle takes care of itself.
The bevel map (optional, and don't overthink it)
Read a few other guides and you'll see grips described by bevel numbers. A paddle handle isn't round, it's an octagon with eight flat faces, and players number them to pin down exactly where the knuckle goes.
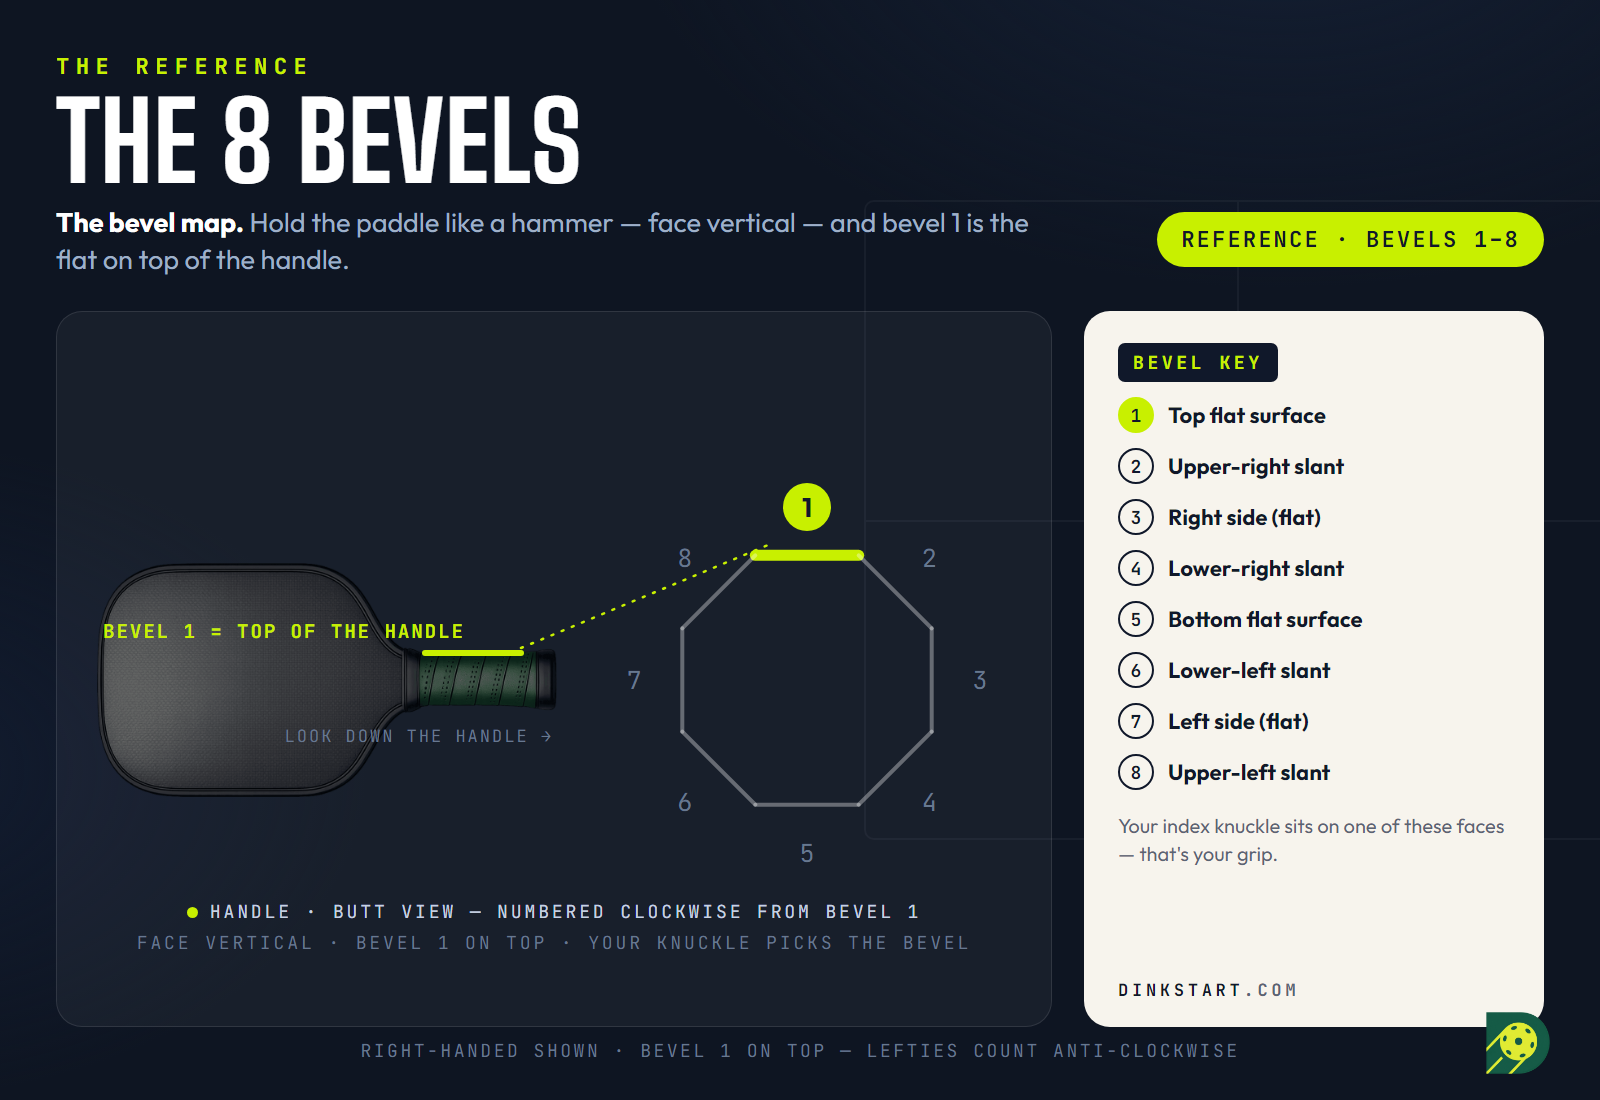
Handy for precision, but here's the catch that trips everyone up: different sources number the bevels differently. One site's "bevel 3" is another's "2nd notch," so if you've found this confusing, it's not you. Don't memorise a number off the internet and panic when it doesn't match someone else's. Go by the feel (the handshake-and-axe cues in each section) and treat the bevel number as a label, not a law. The small diagrams below all use the one standard numbering, so you've got a single consistent reference.
Continental — the hammer grip
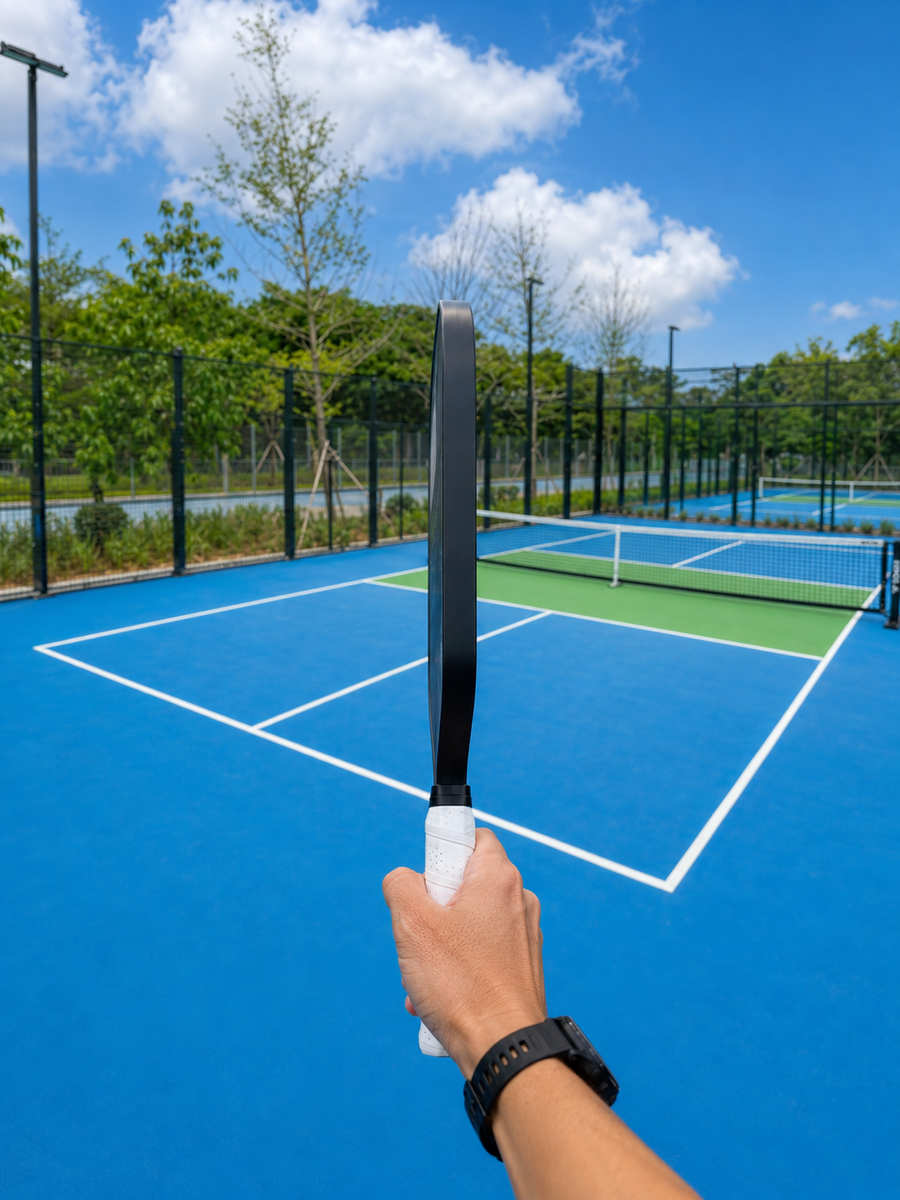
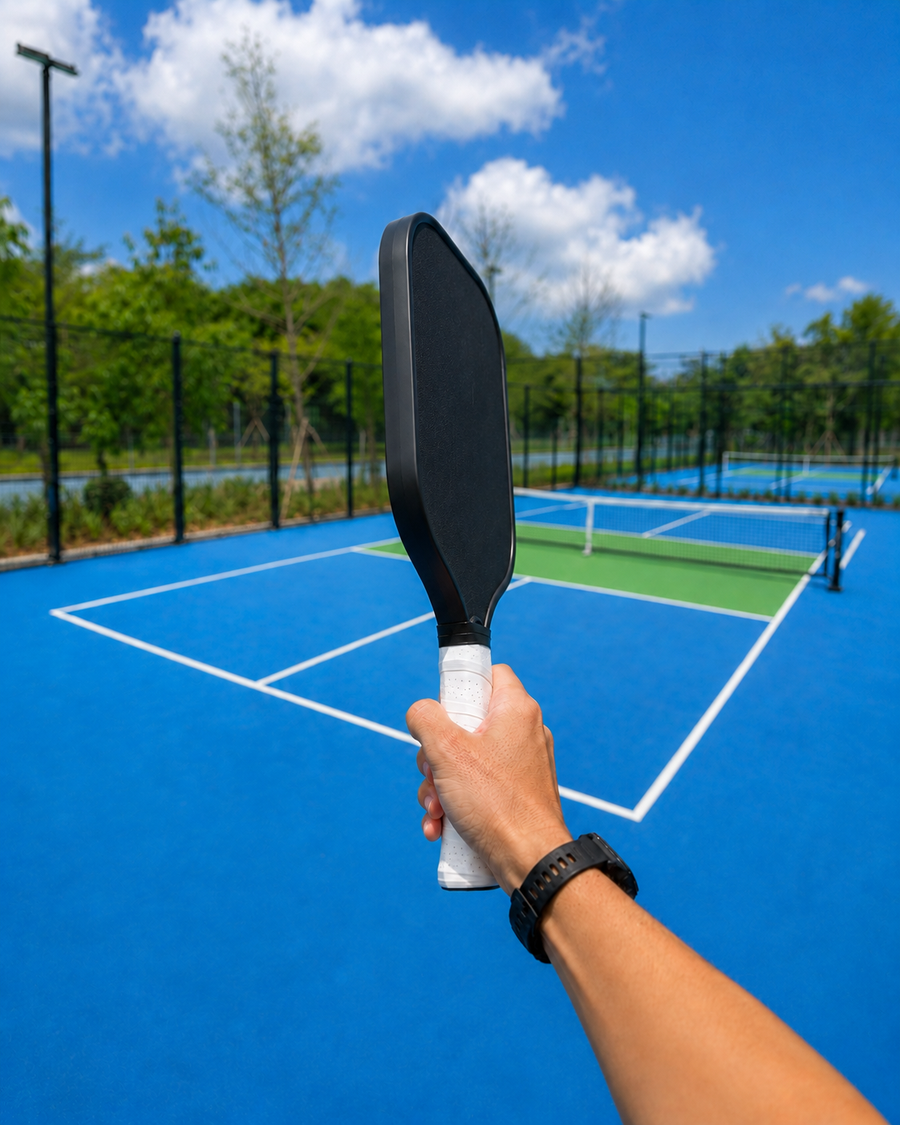
How to find it: Hold the paddle out in front of you like you're about to hammer a nail, blade pointing up, edge facing forward, then grab the handle. The "V" between your thumb and index finger runs straight down the top edge. That's the whole thing. Your X knuckle settles onto the upper corner of the handle without you having to think about it.
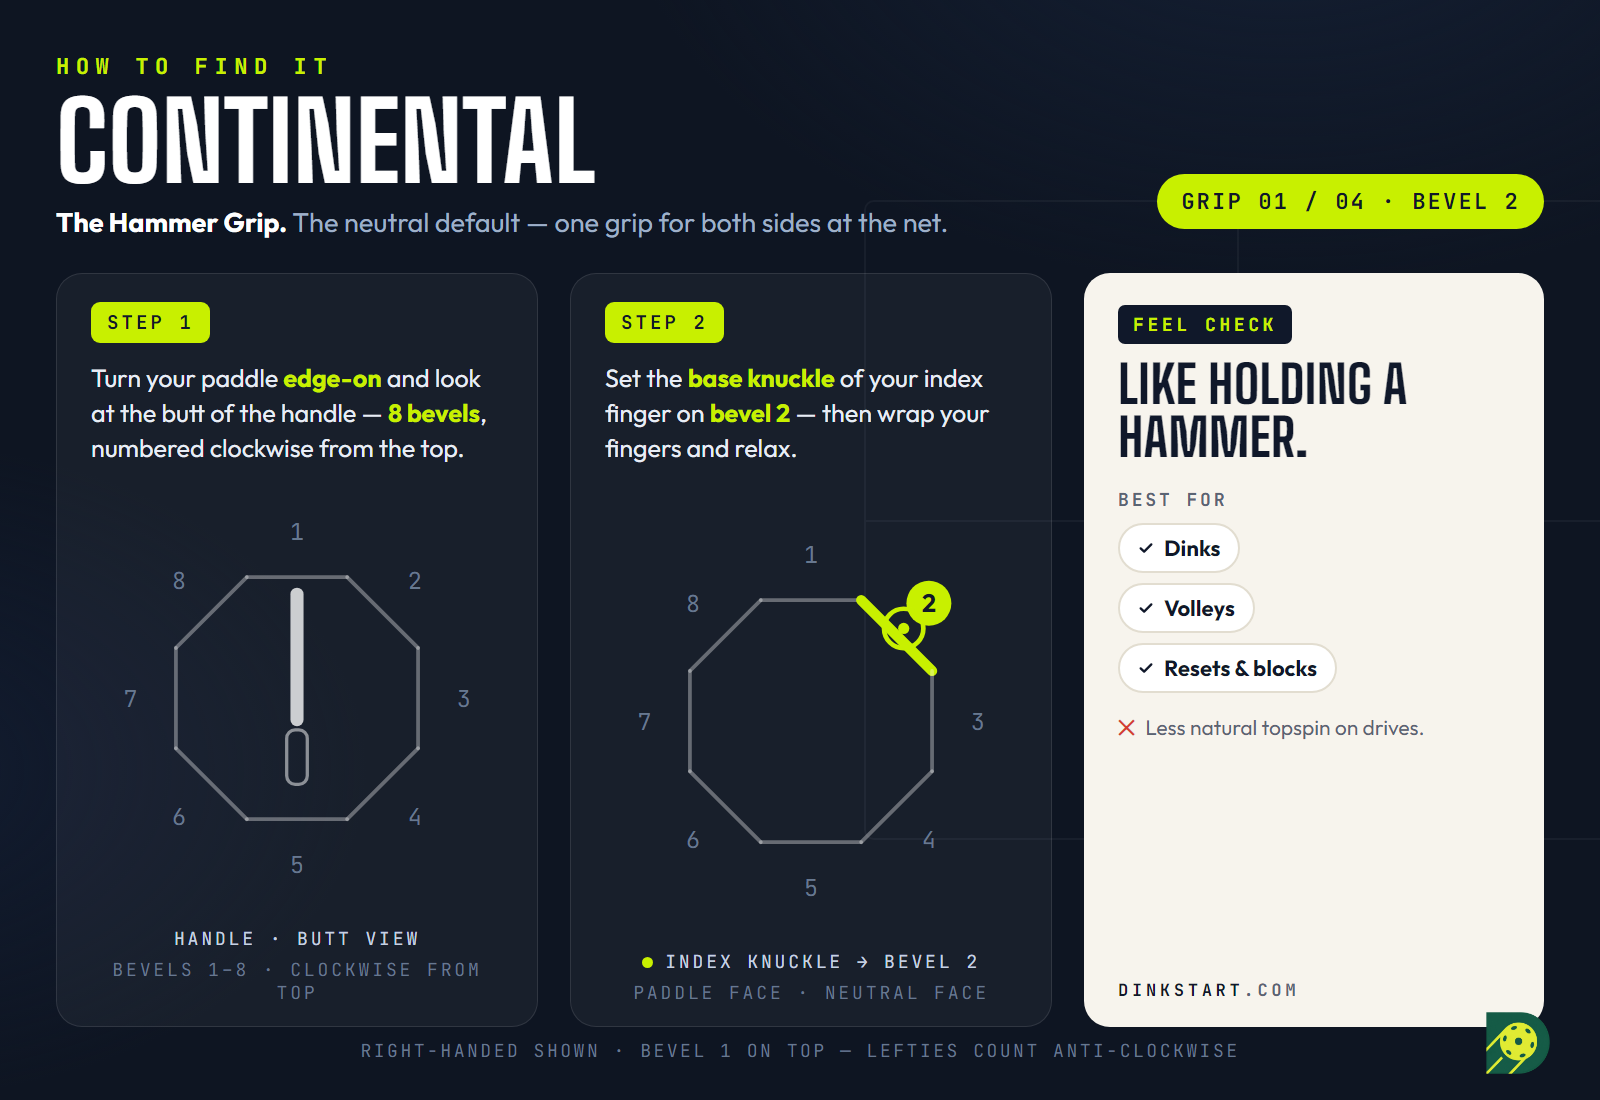
What it's for: This is your home base. The kitchen line lives and dies on Continental, dinks, volleys, blocks, resets, and emergency reaction shots all run off this one grip, on both the forehand and backhand side, with no switching. When a ball comes at you at 60 km/h in a hands battle, you do not have time to change grips. Continental means you never have to.
Pros: One grip for both wings. King of the kitchen. The fastest hands at the net, because you're never mid-switch.
Cons: It's biomechanically hard to crank heavy topspin or a big flat drive from Continental. Power is its weak spot.
Verdict: Start here. Honestly, 90% of recreational players never need another grip. Master Continental first and everything else is optional.
Eastern — the all-court grip
How to find it: Shake hands with the paddle. Lay your palm flat against the paddle face, then slide your hand straight down onto the handle without twisting, and grip. That's it. Coming from Continental it's a small rotation that rolls your X knuckle about one face around, onto the flat side of the handle.
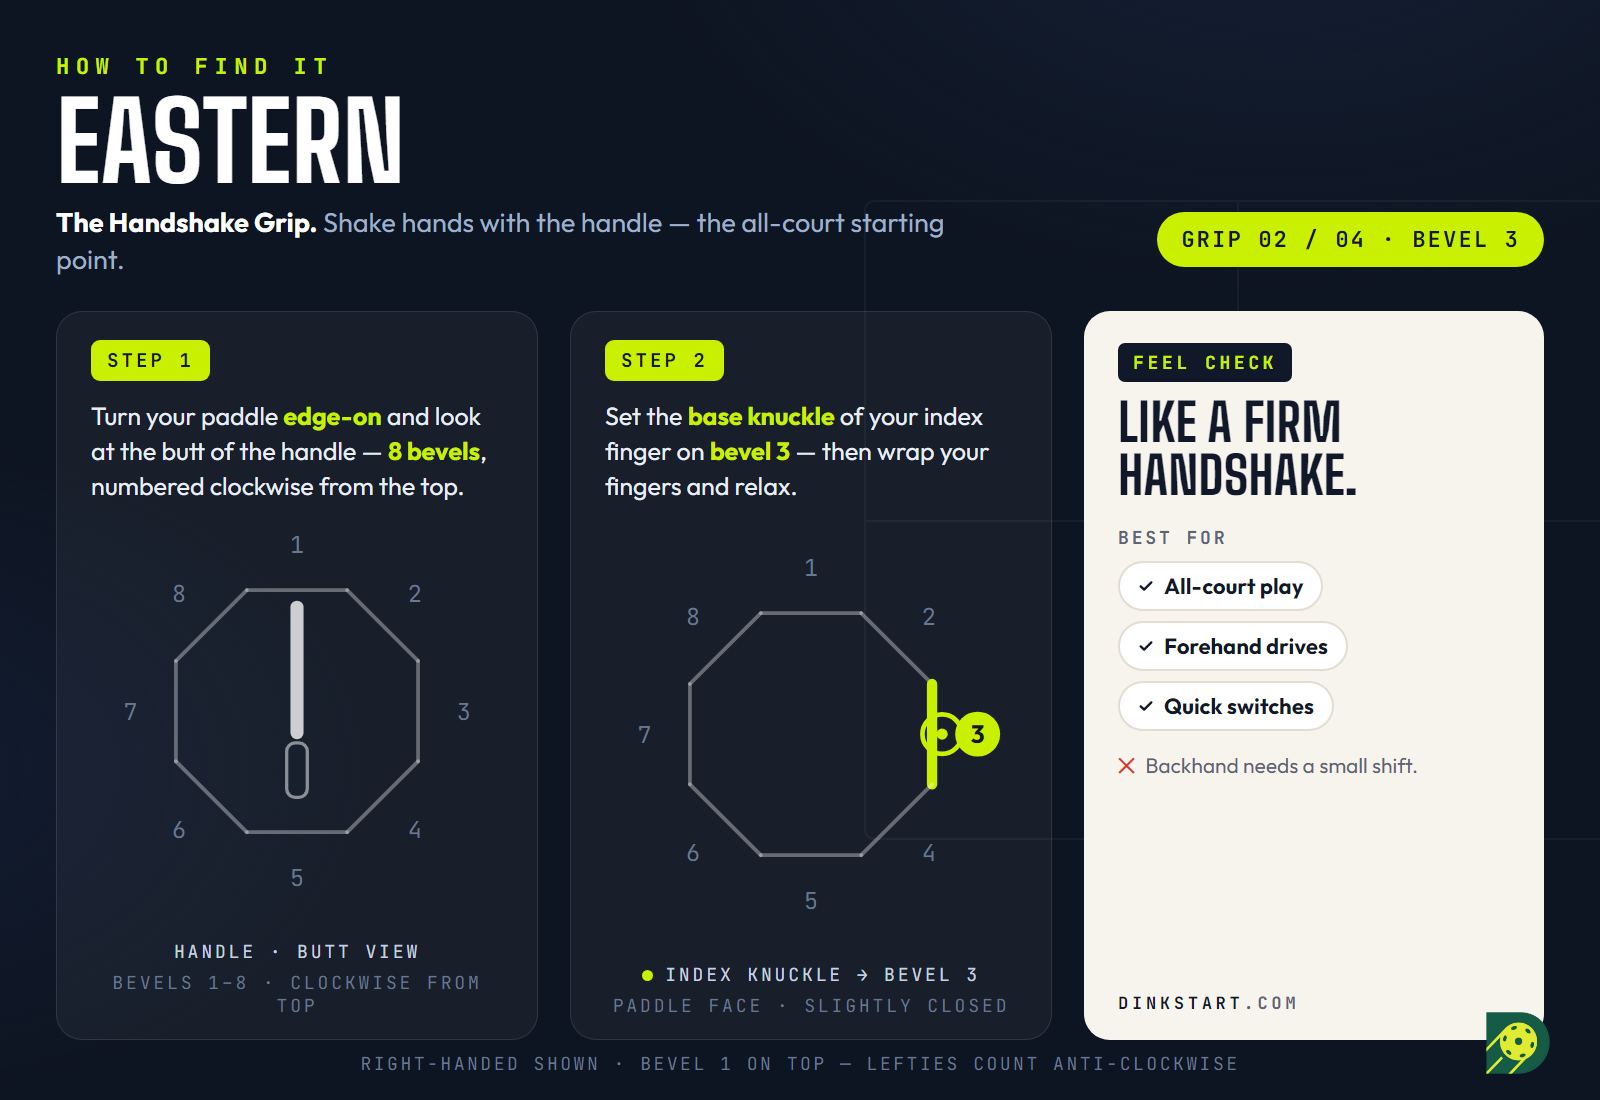
What it's for: Forehand drives, serves, and put-aways. With your hand behind the paddle you can roll over the ball and add natural topspin, so your drives carry more pace and still drop in. This is the grip most touring pros build their forehand on. It's also intuitive, especially if you come from tennis, the forehand will feel immediately familiar.
Pros: A real balance of power and control. Stronger forehand than Continental. Easy to learn.
Cons: The backhand gets awkward, many players switch grips (or go two-handed) on that side. And your net hands are a touch slower than pure Continental, because the face isn't as neutral.
Verdict: Add this second. Great if you came from tennis, or once your forehand wants more pop than Continental gives.
Semi-Western — the in-between topspin grip
How to find it: Start from Eastern's handshake, then roll your hand one more face under the handle, so your X knuckle lands on the lower-right slant (bevel 4). The paddle face closes noticeably toward the court. If you played tennis with a semi-western forehand, your hand already knows this position — it's the same grip.
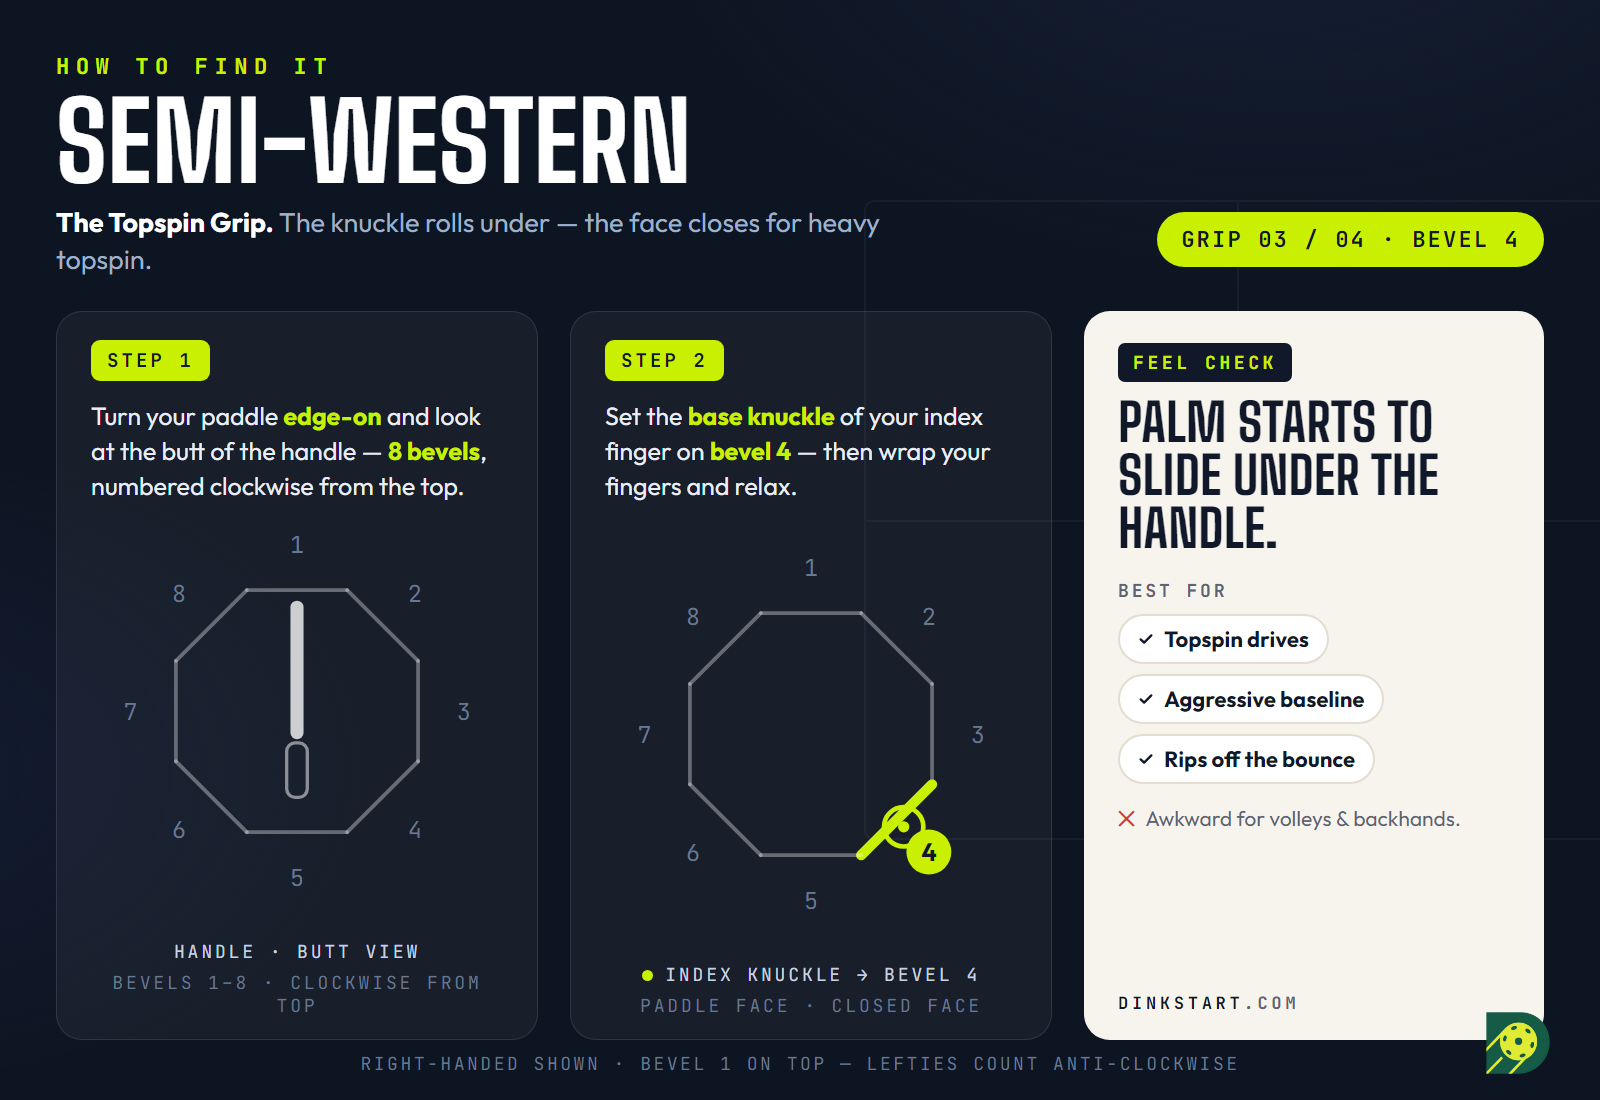
What it's for: Heavy topspin forehand drives from the baseline, without going full Western. The closed face lets you whip up the back of the ball, so drives dip hard and still land in. It's the natural home for converted tennis players who grew up hitting topspin.
Pros: Serious topspin with more control than full Western. Instantly familiar if your tennis forehand was semi-western.
Cons: Volleys and dinks get awkward, the closed face wants to drag every soft ball into the net, and the backhand needs a big shift or a second hand.
Verdict: A tennis-convert shortcut, not a destination. Borrow it for forehand drives if your hand already knows it, but still build your net game on Continental.
Western — the topspin grip
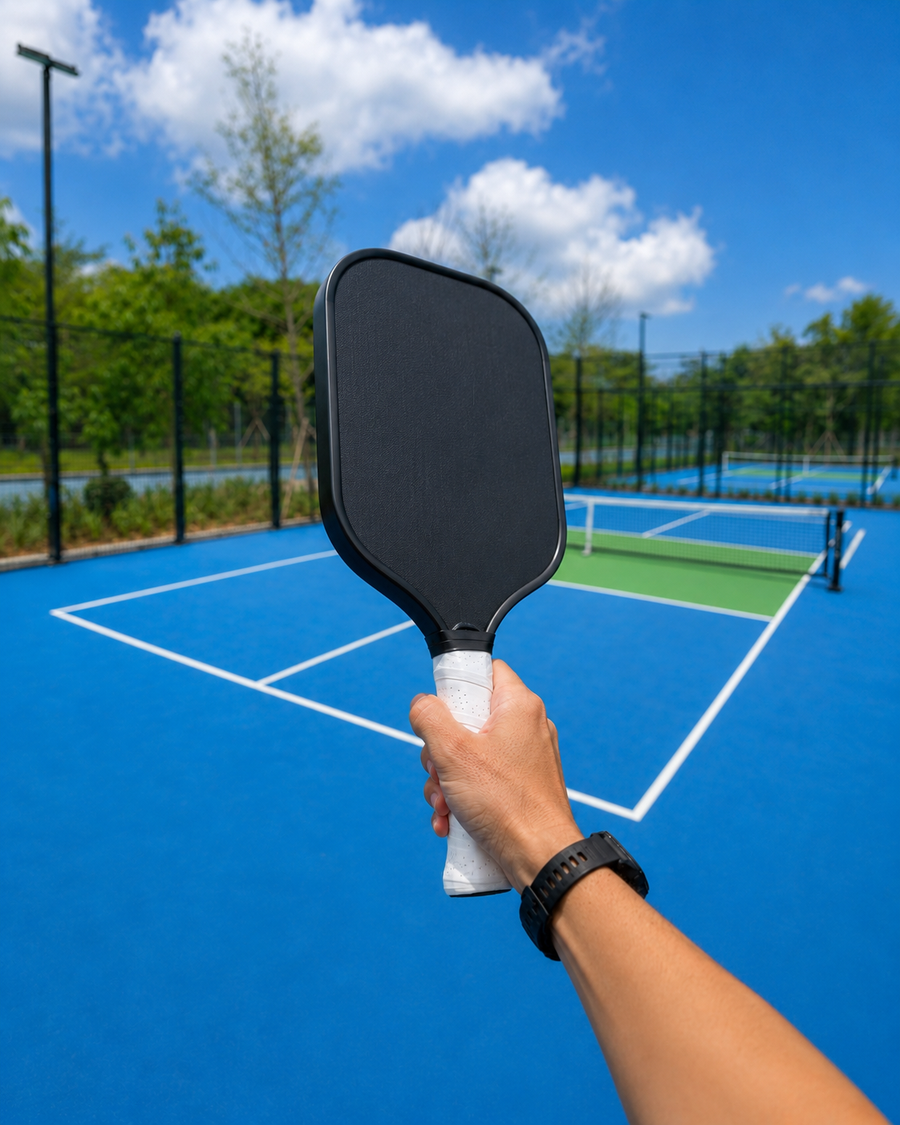
How to find it: Two ways to feel it: hold the handle like you're swinging an axe, or lay the paddle flat on the ground and pick it straight up without turning your hand. Either way your hand ends up almost entirely behind the handle, with the X knuckle rolled around to the bottom face, which closes the paddle face down toward the court. Pros call the resulting shape a "pancake" or "fly swat."
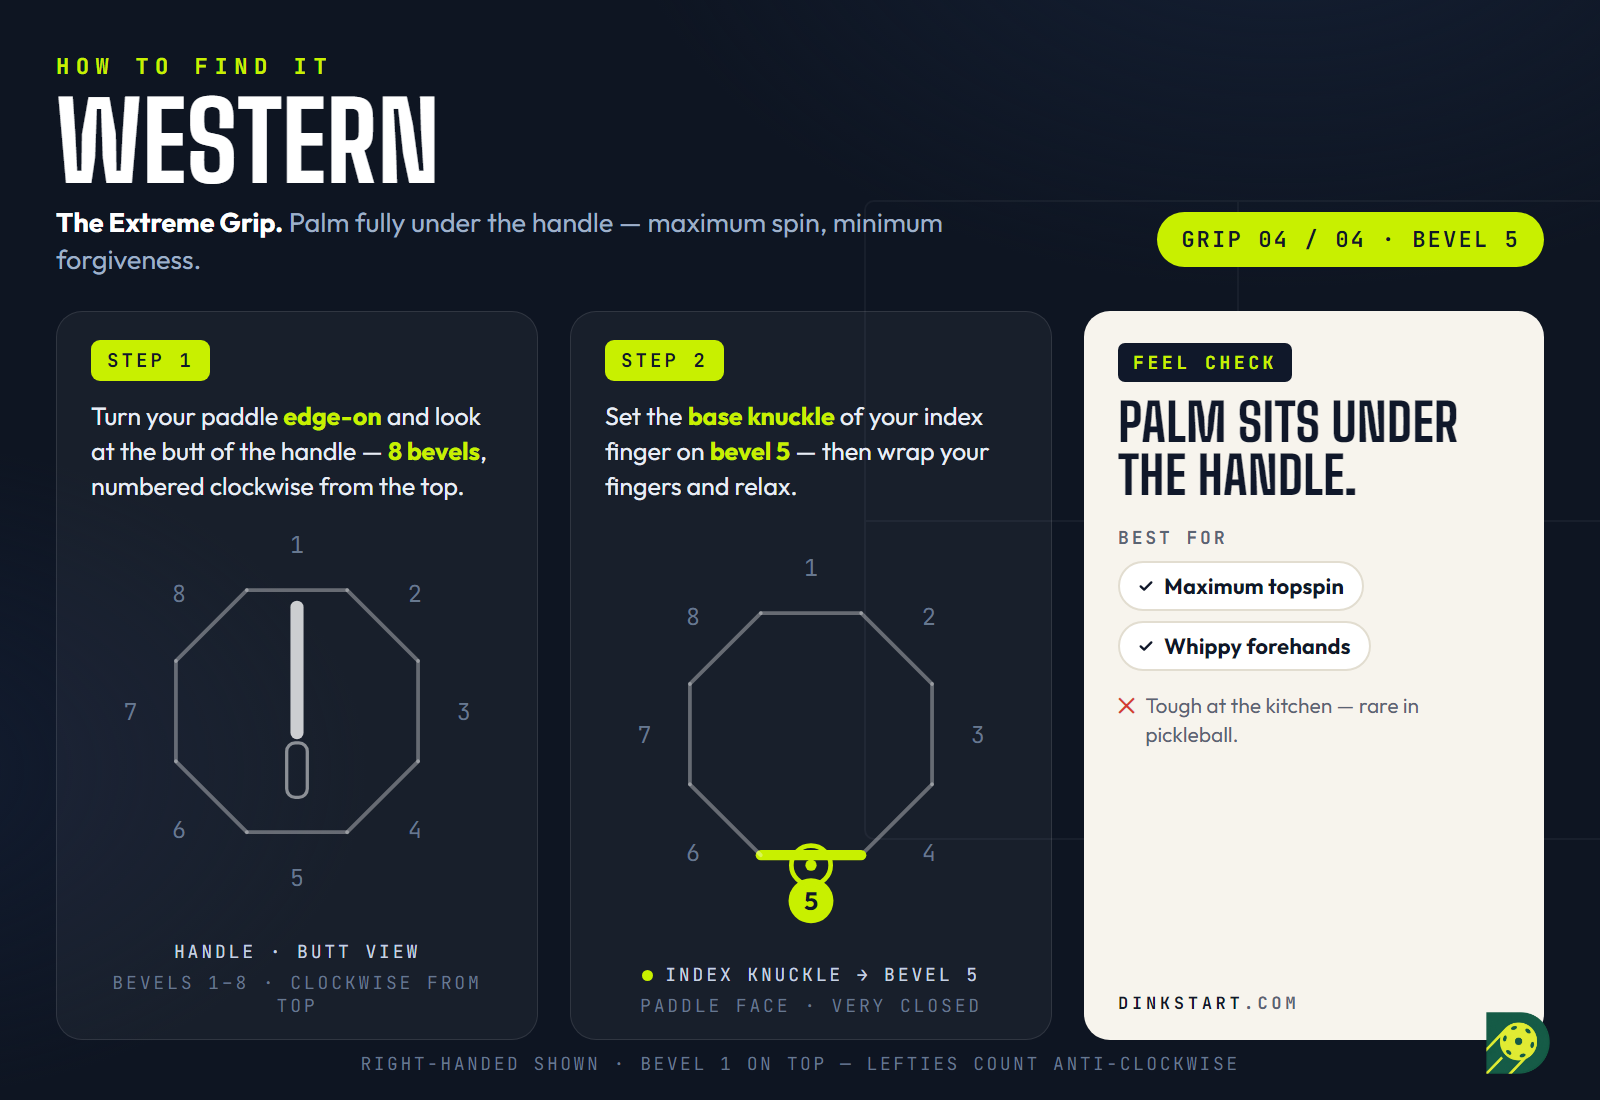
What it's for: Extreme topspin and heavy, dipping forehand drives from the baseline. It's also a sneaky-good shoulder defence, when a ball jams you at your dominant shoulder, you can just swat it away (the "scorpion" and "pancake" counters) where a Continental player gets stuck.
Pros: Massive topspin. A naturally closed face that makes the ball dip hard.
Cons: A very weak, very awkward backhand, you essentially must go two-handed. Slow, clumsy dinks at the net. And it's the hardest of the lot to learn.
Verdict: Skip it for now. Western is an advanced, situational tool, not a beginner grip. File it away and come back at 4.0+.
The honest comparison
If you want it on one screen, here's how the three classic grips stack up. (Semi-Western sits between Eastern and Western on every axis — more spin than Eastern, more control than Western.)
| Continental | Eastern | Western | |
|---|---|---|---|
| Net play | ● ● ● | ● ● | ● |
| Power | ● | ● ● | ● ● ● |
| Spin | ● | ● ● | ● ● ● |
| Easy to learn | ● ● ● | ● ● | ● |
| Best for | Beginners | All-court | Spin |
The short version:
- Best at the net (dinks, blocks, volleys): Continental, by a mile.
- Best forehand power and serve: Eastern.
- Most topspin: Western, then Semi-Western, then Eastern.
- Easiest to learn: Continental, then Eastern.
- Best for beginners: Continental. It isn't close.
The habit that beats every grip
Here's the part almost no one tells beginners: good players don't pick one grip and live there. They have a neutral home base and they keep coming back to it.
That home base is Continental. You wait for the ball in Continental because it's the most neutral, the fastest to react from, and it covers both wings. When you set up to drive a forehand or serve, you briefly rotate to Eastern, and then the instant the shot's gone, you reset back to Continental as you move toward the kitchen.
The move that gets you between them is the one-handed shimmy: loosen your hand for a split second and let the handle rotate in your palm to the next bevel, then re-grip. It feels clumsy at first. Practise it on the couch while watching TV until it's automatic, and one day mid-rally you'll realise you did it without thinking.
So the real progression isn't "Continental or Eastern." It's "Continental, with an Eastern you can borrow when you want power, and a reset back to neutral every single time."
Two small things that matter more than you'd guess
Spread your index finger. Don't grab the handle in a tight fist (the "hammer grip"). Slide your index finger up and slightly apart from the others, like a trigger finger. It gives you far more control over the paddle face and lets you hold the handle loose, which keeps your hands fast and your touch soft. A clenched grip is a slow, tense grip.
Use the whole handle. Don't choke up the handle ping-pong style with your hand crowding the face. Your pinky should sit within a centimetre of the bottom, even hanging slightly off the end. That extra length is leverage, it's free power and reach, and you're throwing it away if you ride up the handle.
What to actually do (the beginner path)
- Learn Continental and live there. Hammer grip, both wings, no switching. This single grip will carry you through your first dozen sessions and most of open play after that.
- Add Eastern for your forehand and serve once you want more pace. Practise the shimmy from Eastern back to Continental so you're never stuck in a power grip at the net.
- Leave Semi-Western and Western alone until you're chasing heavy topspin at an advanced level. The one exception: if your tennis forehand already lives on Semi-Western, you can borrow it for drives from day one.
- Fix the small stuff: spread that trigger finger, hold loose, use the full handle.
That's the whole map. You don't need to be a grip nerd, you need Continental in your hands and the discipline to keep returning to it. Get that, and you've already solved the thing quietly capping most beginners' games.
New to all of this? Start with the rules that matter for your first 10 sessions, then sort out what to bring to your first session in Hong Kong. See you at the kitchen line.